How to Create Virtual Talking Avatars

This guide gives a practical end-to-end workflow for building virtual talking avatar videos, similar to modern creator tutorials and demos.

Updated: February 22, 2026.

Step-by-Step Instructions

  1. Write script and shot plan

    A short, spoken script split into scenes (hook, body, CTA).

    How to do it:

    • Define one target viewer and one desired action (follow, click, comment, buy).
    • Write a 20-60 second script using spoken language, not blog style.
    • Split the script into scene blocks: hook (0-3s), value (3-20s), CTA (last 3-5s).
    • Create a shot list that maps each line to a visual background or b-roll cue.

    Quality checks:

    • Read it out loud once. Remove lines that sound unnatural.
    • Keep one idea per sentence; avoid multi-clause, long phrases.
    • Target 120-160 words per minute equivalent pacing.

    Tools: ChatGPT , Claude

  2. Create or pick a voice

    Natural narration voice (stock or cloned) aligned with brand tone.

    How to do it:

    • Choose voice profile by audience: authoritative, friendly, tutorial, or sales.
    • Generate voice in short chunks (1-2 sentences) for easier retakes.
    • Adjust speed, stability, and style until pronunciation is consistent.
    • Export clean WAV/MP3 with no background music.

    Quality checks:

    • Normalize loudness to consistent level before avatar generation.
    • Fix names/brands with phonetic spelling if mispronounced.
    • Listen for robotic cadence on long sentences and split if needed.
    ComfyUI TTS workflow with Qwen3 TTS engine, text generation node, and audio export node
    ComfyUI TTS example: Qwen3-TTS engine node to text generation node to MP3 save node.

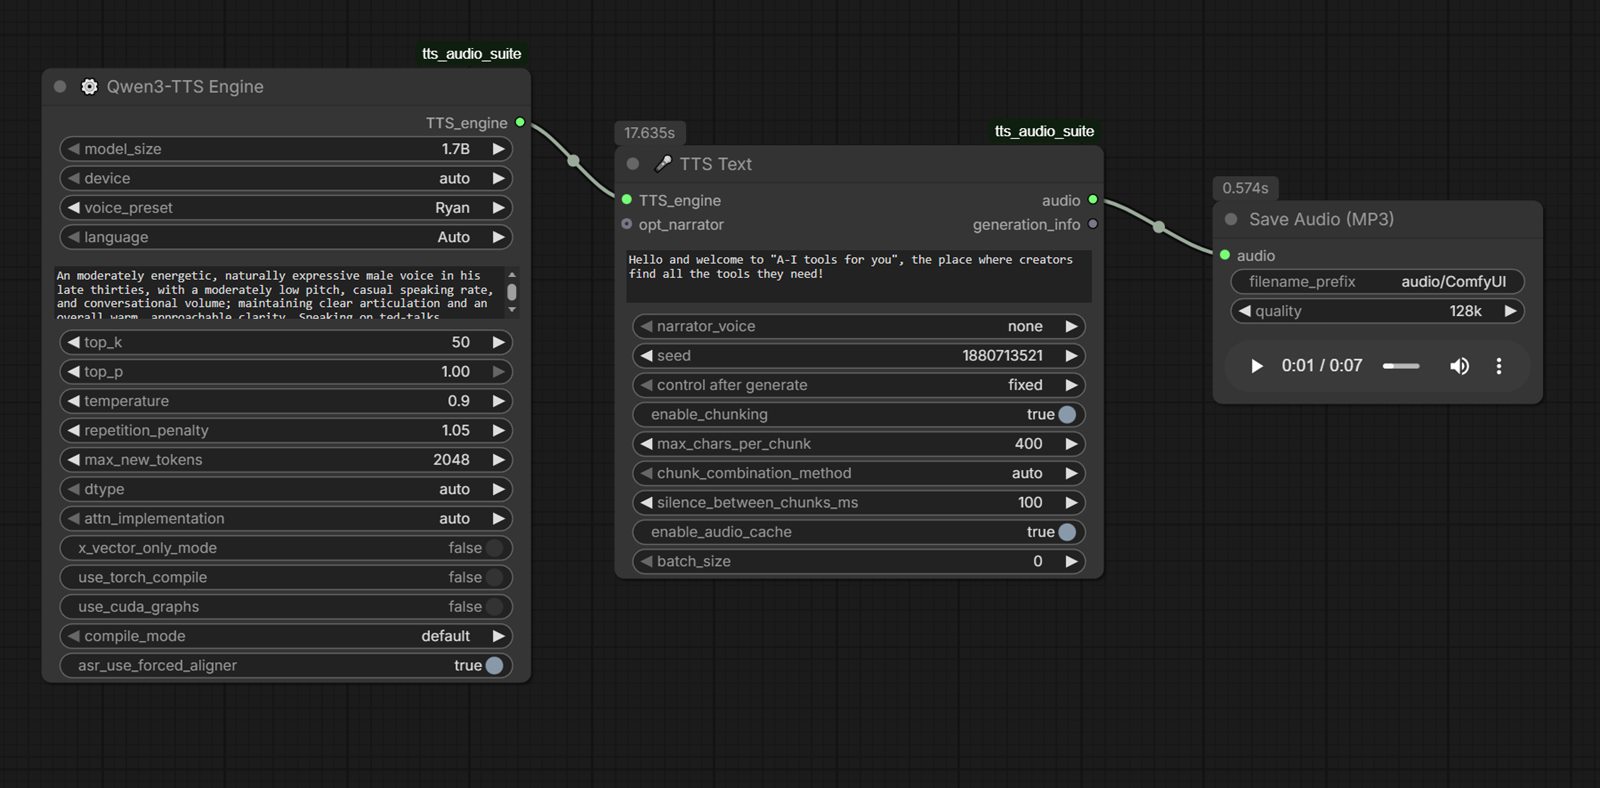
    Sample output audio (Qwen3 TTS):

    Direct file: comfyui-qwen3-tts-sample.mp3

    Tools: ElevenLabs , Murf , Piper TTS (local) , ComfyUI TTS (local)

  3. Create avatar face/character

    A clean portrait/character image to drive talking animation.

    How to do it:

    • Generate a front-facing portrait with neutral expression and clear jawline.
    • Use simple background and even lighting for better lip and chin tracking.
    • Create 3-5 variants and pick one with best facial symmetry and eye clarity.
    • Export high-resolution image (at least 1024px on shortest side).

    Quality checks:

    • Avoid heavy side angles, sunglasses, or hair covering mouth.
    • Avoid extreme stylization that distorts lips and teeth area.
    • Keep avatar look consistent with your channel brand.
    ComfyUI character creation workflow for avatar face generation
    ComfyUI character creation example for generating clean avatar faces before lip-sync.

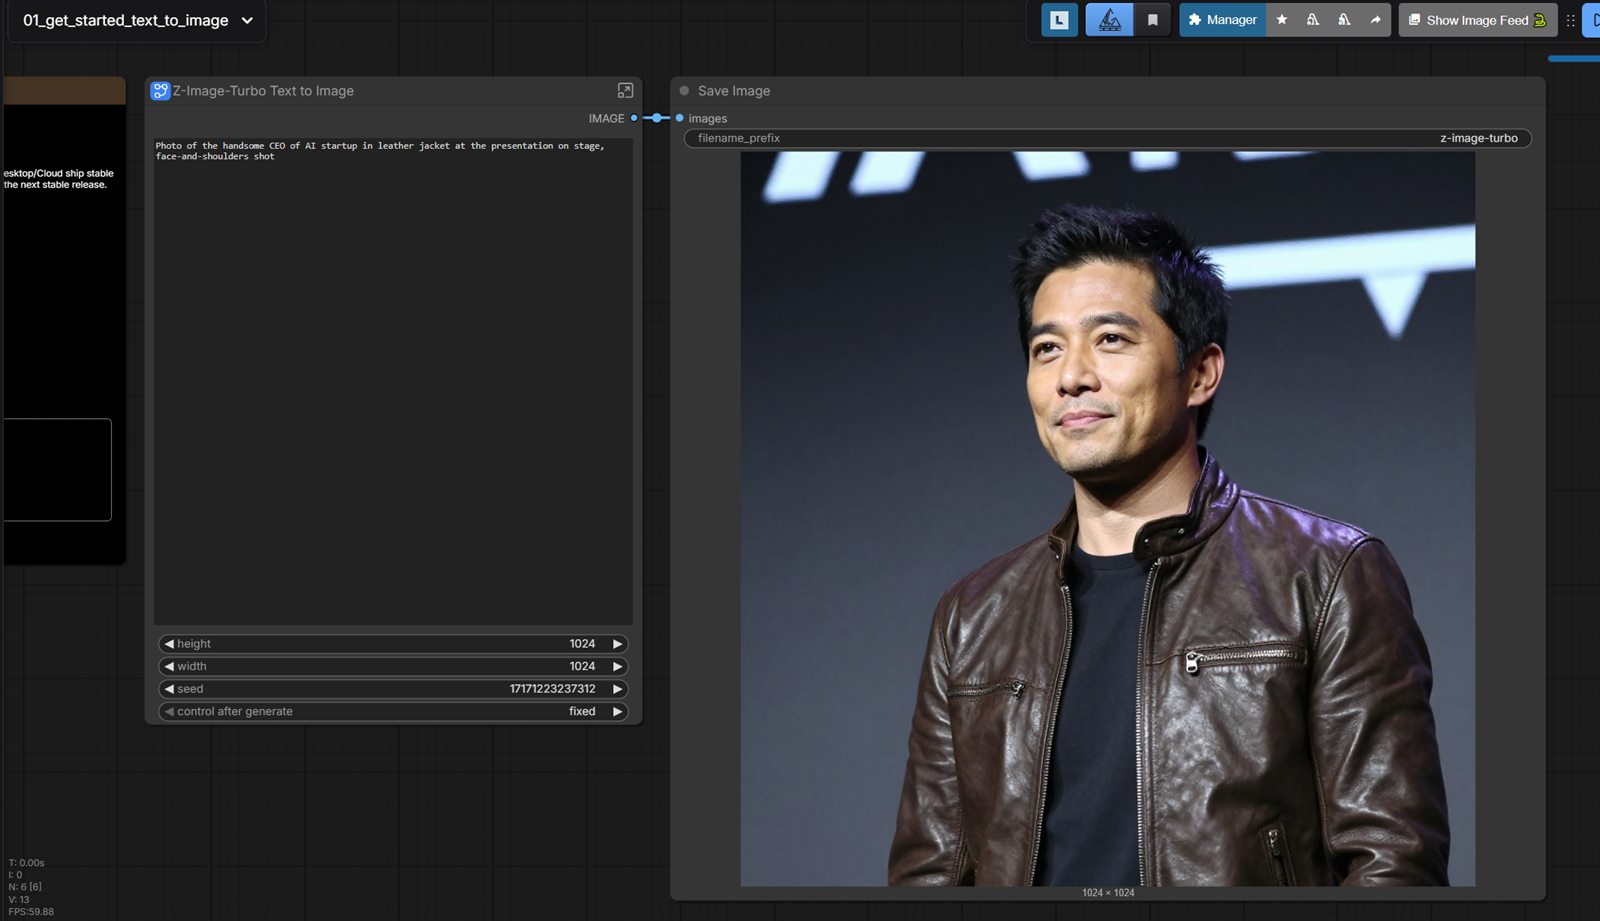
    Tools: Midjourney , Leonardo AI , Adobe Firefly , ComfyUI (local)

  4. Generate talking avatar video

    Lip-synced avatar speaking your script/audio.

    How to do it:

    • Upload final voice track and selected face image to avatar generator.
    • Set framing (headroom, shoulder crop, eye line) for platform format.
    • Render short test clip first (5-10s), then full script.
    • If lip sync drifts, re-render with shorter sentence chunks.

    Quality checks:

    • Check mouth closures on hard consonants (P/B/M) and long vowels.
    • Check blink frequency and eye movement for unnatural artifacts.
    • Reject outputs with obvious chin jitter or frame warping.

    Tools: HeyGen , Synthesia , D-ID , Tavus

  5. Local/free avatar path (optional)

    Offline or self-hosted talking portrait workflow.

    How to do it:

    • Prepare local environment (GPU drivers, Python env, model assets).
    • Run one baseline workflow in LivePortrait or SadTalker first.
    • Use ComfyUI templates if you want reusable graph-based iterations.
    • Save working presets for resolution, frame rate, and audio sync.

    Quality checks:

    • Validate VRAM usage before batch runs.
    • Keep source assets in predictable folder structure for repeat runs.
    • Version your workflow JSON so results are reproducible.
    ComfyUI speech-to-video workflow interface for avatar video generation
    ComfyUI speech-to-video UI example for turning narration pipelines into video outputs.
    Generated sample video from ComfyUI speech-to-video workflow.

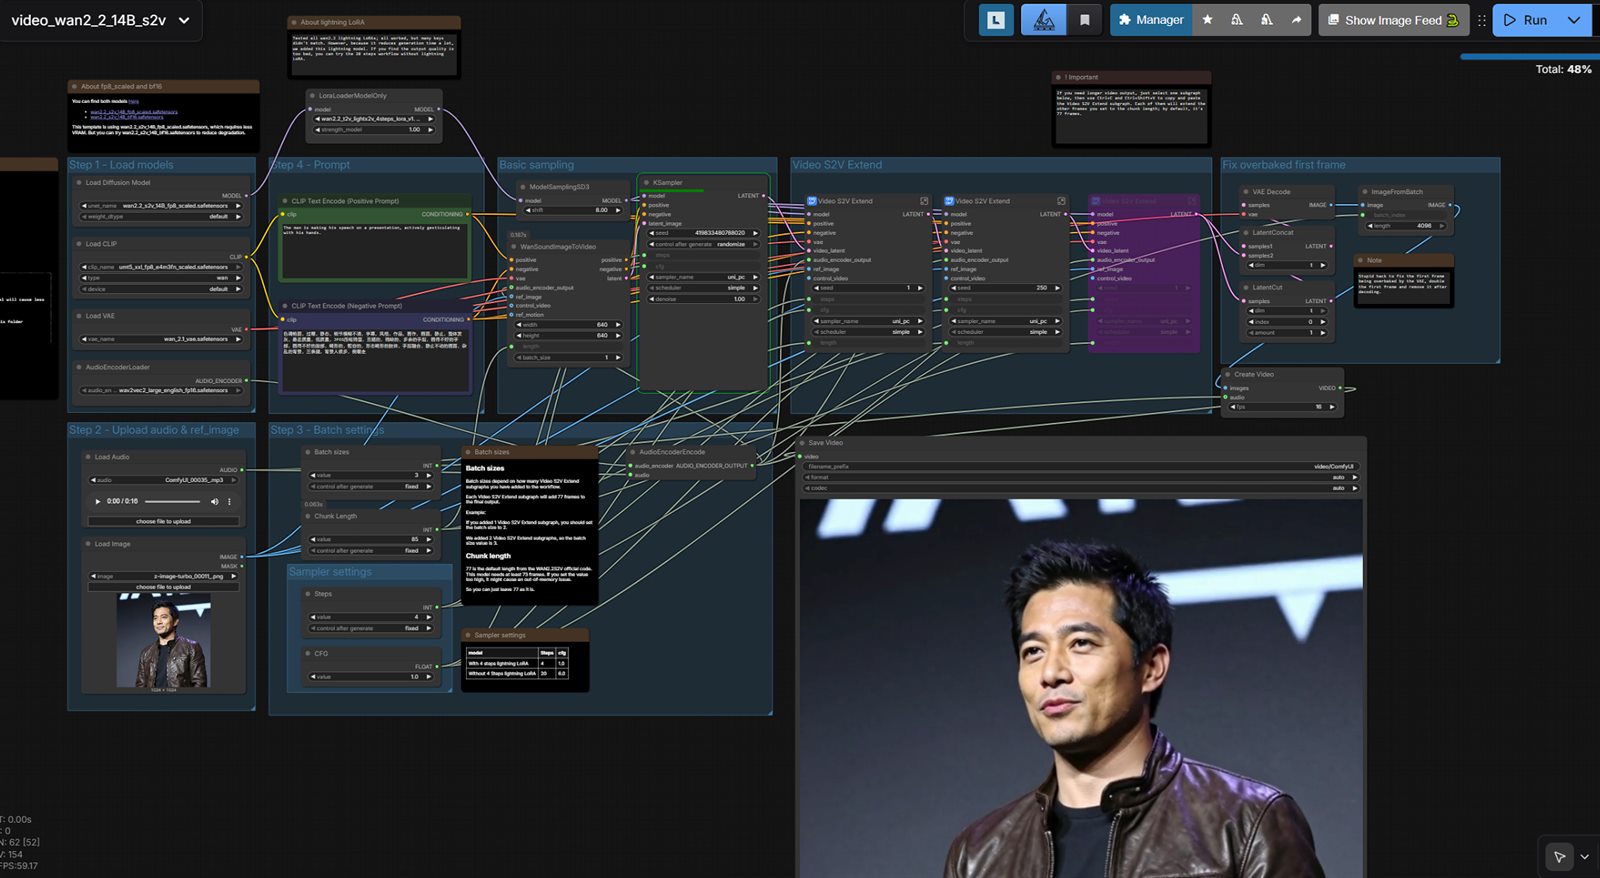
    Tools: LivePortrait , SadTalker , ComfyUI

  6. Edit, captions, and export

    Platform-ready video with subtitles and pacing tuned for retention.

    How to do it:

    • Cut pauses and trim the first 0.3-0.8 seconds to start faster.
    • Add burned-in captions with high contrast and large mobile-safe size.
    • Insert b-roll, screen captures, or text callouts for emphasis.
    • Export separate variants for Shorts/Reels/TikTok and landscape feeds.

    Quality checks:

    • Review first 3 seconds: clear hook, readable text, immediate motion.
    • Check subtitle timing drift on fast phrases.
    • Confirm final safe margins so text is not hidden by platform UI.

    Tools: Descript , CapCut , VEED

Tools Needed (Quick Matrix)

Stage Cloud Tools Local/Free Tools Practical Note
Script ChatGPT , Claude Ollama , local models Keep script short and spoken-language friendly.
Voice ElevenLabs , Murf Piper TTS , Coqui TTS , Kokoro TTS , ComfyUI TTS Normalize loudness before avatar generation.
Avatar face creation Midjourney , Leonardo AI , Adobe Firefly ComfyUI , Fooocus , AUTOMATIC1111 Generate front-facing, clean-light portrait for best lip-sync results.
Avatar HeyGen , Synthesia , D-ID , Tavus LivePortrait , SadTalker , ComfyUI workflows Use clean source portrait and neutral framing.
Edit Descript , VEED , CapCut DaVinci Resolve, local subtitle tools Trim dead air and add scene transitions.

Minimal Starter Stack

Related pages: virtual avatar services · HeyGen alternatives · ComfyUI alternatives

Share This Page